Since the “real” winter weather has finally come to northeast Ohio, my meal planning has begun centering around hearty, comforting meals. And, since I had some mixed greens that I wasn’t sure what to do with, I decided to try to come up with a meatless version of wedding soup–or, at least, my interpretation of a meatless wedding soup, created with whatever ingredients that I had on hand.
I enjoyed it so much that I did what I usually do–I posted a picture on Facebook. Since many of my friends are also foodies, it received some “likes” and even requests for the recipe (a high compliment that I relished quite vigorously, indeed). Therefore, I was finally motivated enough to do another post and share it.
This is a fairly quick recipe that uses a modest number of ingredients, and it could always be tailored to fit either your personal preferences or the ingredients that you have on hand. I hope that you enjoy it as much as I did. Happy eating!
Vegetable Soup With Mixed Greens
8-10 cups of vegetable broth (I used 6 Knorr’s Vegetarian Vegetable Bouillon cubes)
5 ounces fresh mixed greens
3 medium carrots, sliced, diced, or grated (whichever you prefer)
5 celery heart stalks, sliced, diced, etc. (I wouldn’t recommend grating the celery ;))
2 cans of cannellini beans (white kidney beans; of course, any type of beans that you enjoy could be substituted or added)
1 cup of dried orzo, cooked and drained
garlic salt blend, pepper, and turmeric (to taste)
In a very large pot, heat the vegetable broth until it is simmering nicely. Add garlic salt blend, pepper, and turmeric (or whatever spices you prefer) until it tastes the way that you want it to. Add the carrots and celery; simmer until tender.
Add the fresh greens and simmer until the greens are nicely cooked.
Rinse 2 cans of cannellini beans; add to the pot.
Add the cooked orzo. Heat through thoroughly.
Serve with crackers, bread, bread sticks, or anything else that you prefer. This makes a lot, so there should be some left over for the next day or to put in the freezer. Since this was the first time that I made this, I cannot comment on its freezing capabilities, but I would expect it to freeze well.
This will serve a few people, depending upon how much soup each one can or will consume during the meal and whether they love it enough to have more the next day. 🙂
The great thing about a basic casserole recipe is that it’s open to interpretation and variation. This recipe is a twist on a zucchini casserole recipe that I found in A Book of Zucchini Recipes, which was put together by The Garden Club at Southington, Ohio, and published in 1991. (It’s a fabulous cookbook, by the way, and if you can find a copy, I’d highly recommend that you purchase it.) My interpretation of this recipe simplifies things by using frozen vegetables, which not only cuts down on the prep time but allows me to clean out my freezer by using any partially-full bags of frozen veggies while creating a filling, delicious dinner.
While fresh vegetables are obviously preferable, this recipe is perfect for those times of the year when certain vegetables are out of season or unavailable, and it’s quick enough to put together after work or to make a last-minute dish for a potluck or party.
With the variety of frozen vegetables available in most supermarkets today, you can create dozens of versions of this casserole by mixing and matching them or even using different types of instant stuffing. As always, you can use low-fat sour cream and low-fat, low-sodium condensed soup, if you like. I hope that you enjoy this recipe as much as I do. Happy eating!
Vegetable-Stuffing Casserole
4-6 cups of frozen vegetables, thawed. (I usually place them in a strainer and run some cold water over them to at least partially thaw them. I also cut some of the bigger pieces into bite-sized ones, for convenience.) For this recipe, I used a mixture of zucchini/squash blend, carrots, cauliflower, and lima beans.
1/2 of a can of cream of mushroom, celery, chicken, or whatever creamed, condensed soup that you prefer (the other half can be frozen for later use).
3/4 cup of sour cream
1 package instant stuffing mix (about 6 ounces)
1 stick of butter, melted
Thaw or partially thaw the frozen vegetables and drain them. Set aside.
In a large bowl, mix the condensed soup and sour cream. Fold in the vegetables.
In a large bowl or saucepan, melt the butter. Mix in the stuffing and stir to coat thoroughly.
In a 13 x 9 casserole (or one of equal volume), place about half of the stuffing/butter mix on the bottom. Top with the vegetable mixture and then the remaining stuffing.
Bake, uncovered, in a 350 degree oven for 30-40 minutes or until it’s heated through and the top layer of stuffing has reached your preferred level of golden deliciousness.
This will make about 4 servings if you’re having it as a meal and several more if you’re using it as a side dish. It also reheats well in the oven for the next day or two, if it lasts that long.
This is a hearty mix of vegetables and stuffing that is suitable as a side dish or as a meal in itself.
When I was growing up, haluski (cabbage and noodles) was a regular feature on our dinner table, as were perogies and holubki (stuffed cabbage rolls). Since my cultural background is mainly Slavic, these foods hold a special place in my life, as a way to honor and keep in touch with my cultural heritage and as some of my favorite comfort foods since they not only taste delicious but also bring back good memories.
I can also add them to my list of favorite meatless meals (except the holubki, until I find a viable substitute for the ground meat–sorry, Mom!). My version of haluski, which my Mom taught to me, includes both noodles and diced potato. Other versions use cabbage and noodles or cabbage and dumplings, and other ones include meat. This is yet another recipe that can be tailored to fit your preferences and tastes, and, while I’ve tried other versions, my personal preference leans to the carbo-loaded, potato-and-noodle version of my Mom’s, which I have now made into my own.
My recipe provides an easy (if slightly time-consuming) recipe that should be relatively easy for beginners and which more experienced cooks should enjoy, especially since they can tweak it to their liking with their favorite spices or seasonings. So, whether you share my Slavic heritage, love cabbage, or would like to try a new meatless meal, here is my recipe for haluski. Enjoy!
Haluski
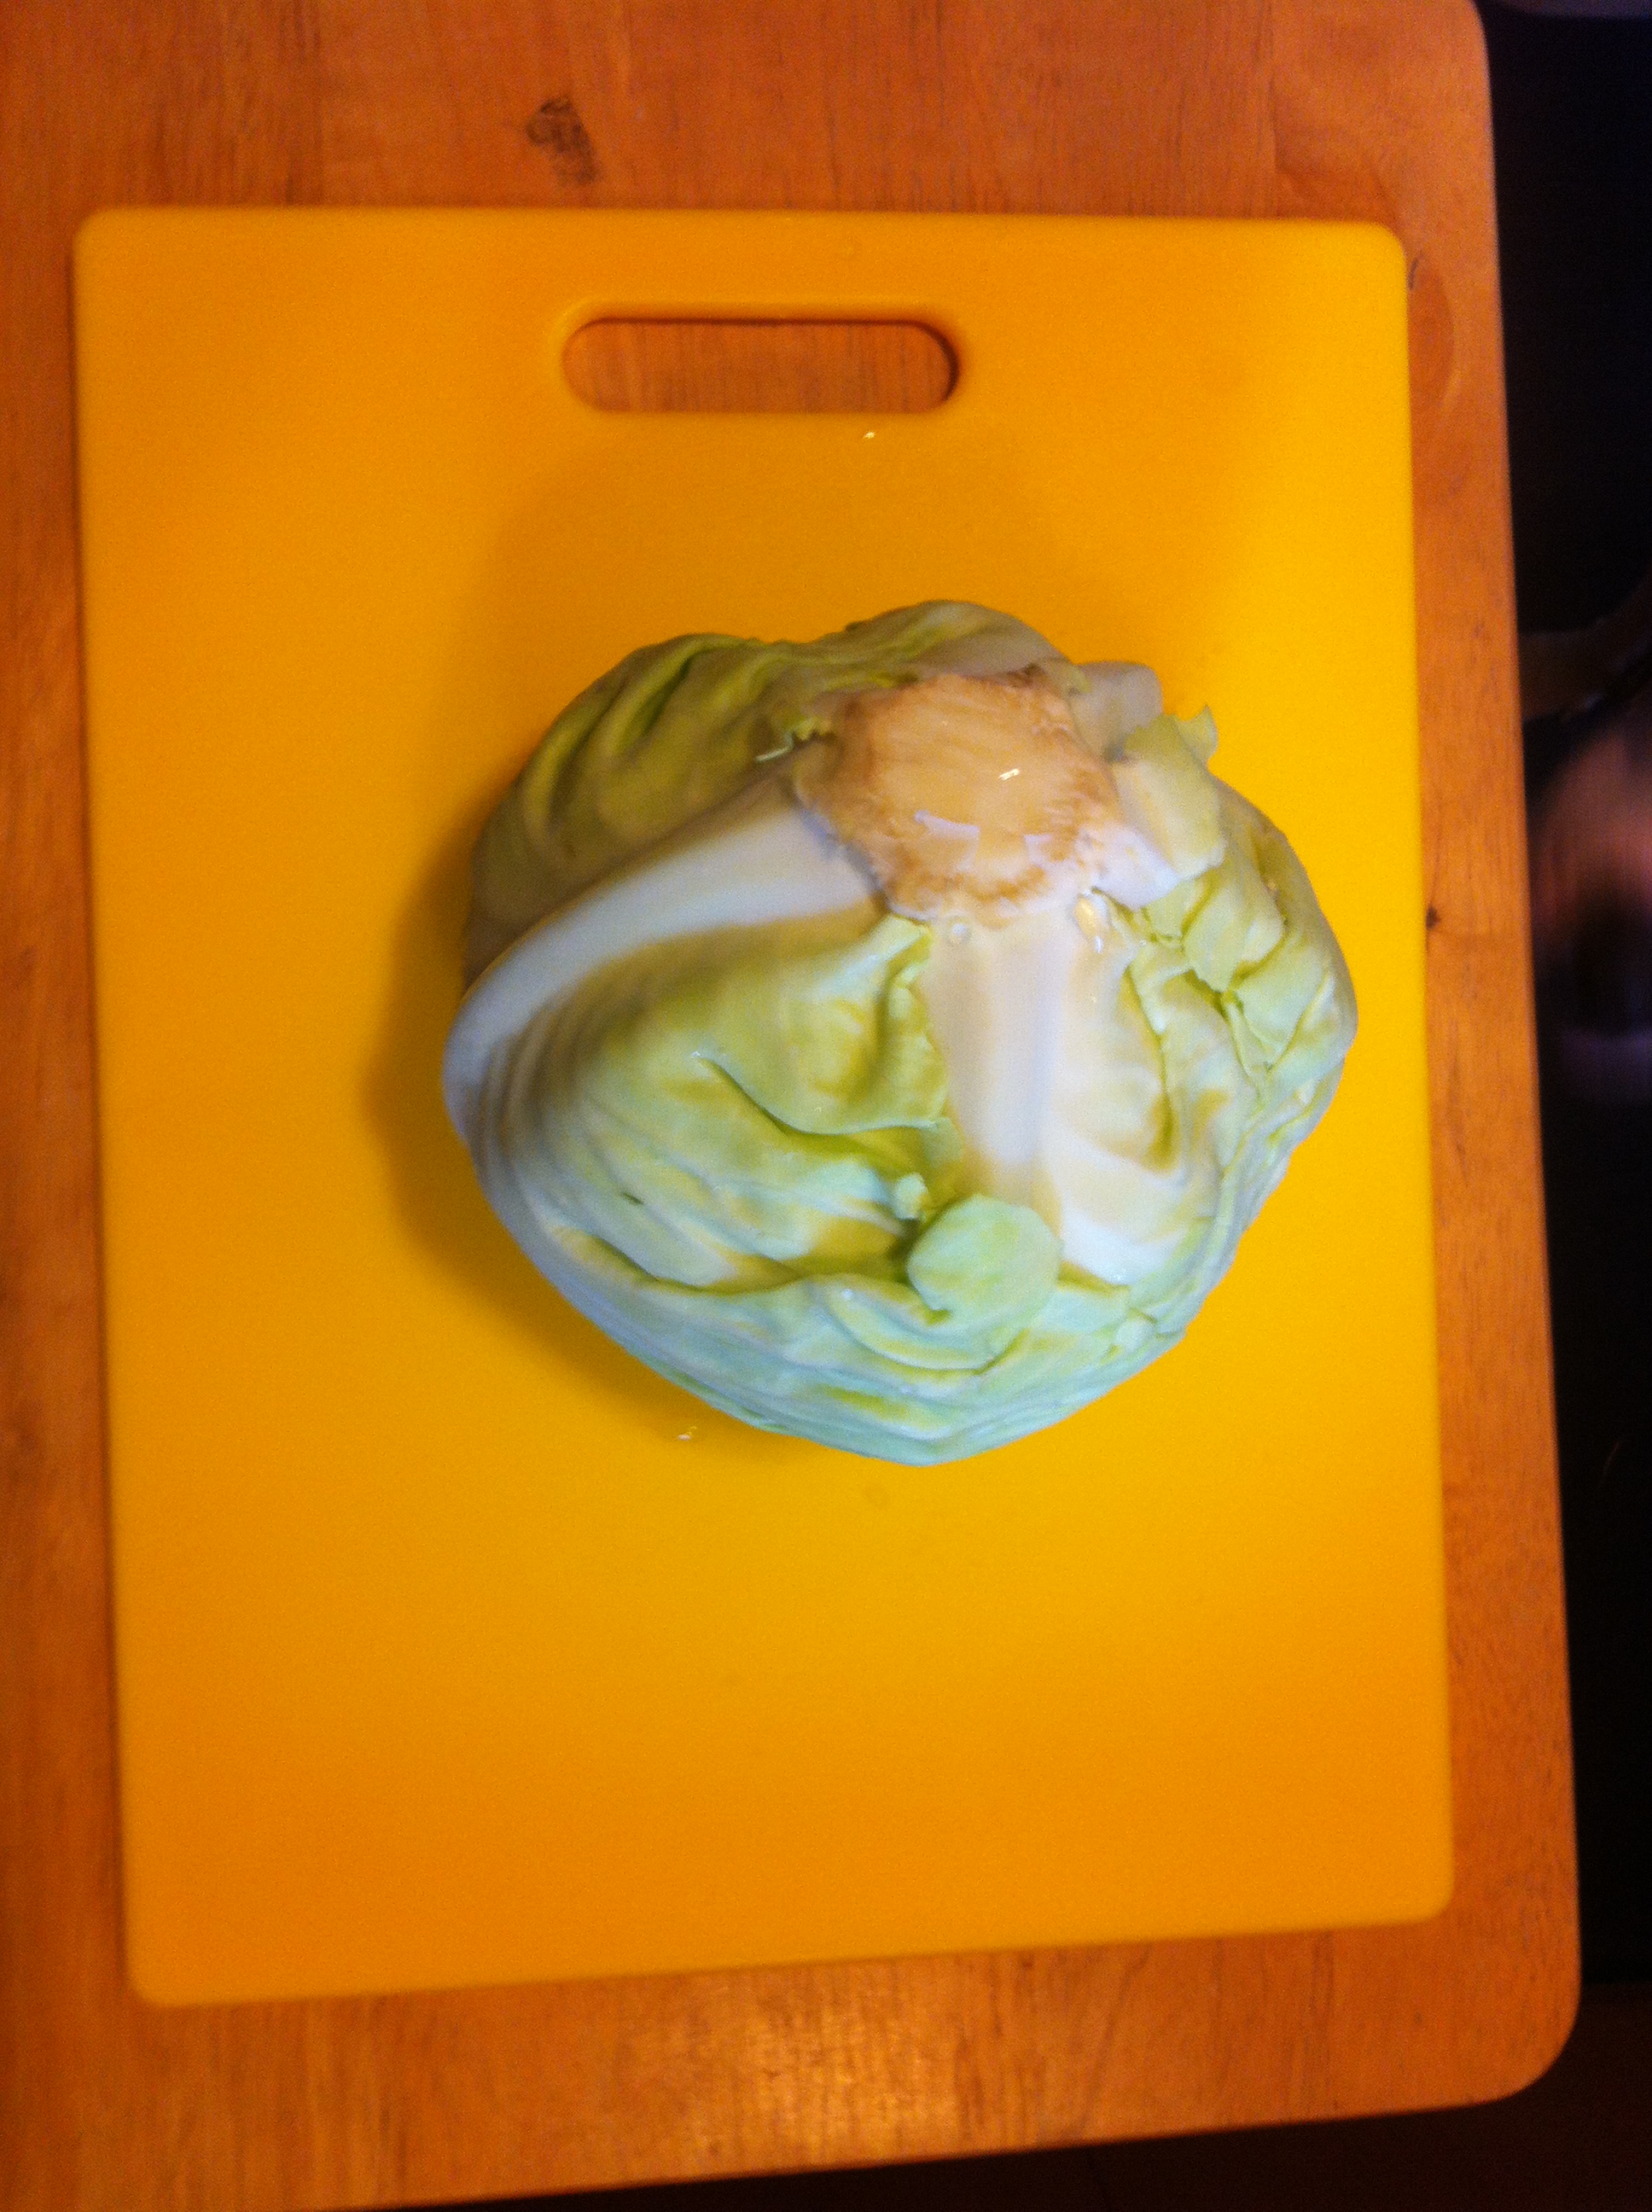
1 medium-to-large head of cabbage (It should be a bright, vibrant green with no dark or soft, mushy spots. It should also feel heavy for its size and quite solid.)
1 bag of noodles (I use wide noodles because I prefer them, but just about any type of noodle will work. I always cook the noodles first and set them aside; if they stick together by the time the rest of the dish is done, simply place them in a colander, rinse them with warm water, and drain before adding to the rest of the ingredients.)
1/4-1/2 cup chopped or sliced onion (This is optional; you could also add as much or as little onion as you like.)
1-2 medium to large baking potatoes, peeled, cubed and cooked almost all of the way (they will cook a bit more when added to the rest of the ingredients and absorb some of the liquid produced by the cooked cabbage).
1-3 Tablespoons butter (I use salted because I simply prefer it; however, you may always use unsalted butter or whichever oil you prefer.)
garlic salt blend (I like Lawry’s since it has garlic powder, salt, and parsley) and pepper, to taste
Cook the noodles and the potatoes beforehand, rinse with cold water, and set aside.
If necessary, take off the outer leaves of the cabbage; since heads of cabbage are not individually wrapped, this just seems like a good idea since these are usually a bit softer and have come into contact with others’ hands as well as being exposed to the air, so I remove and discard.
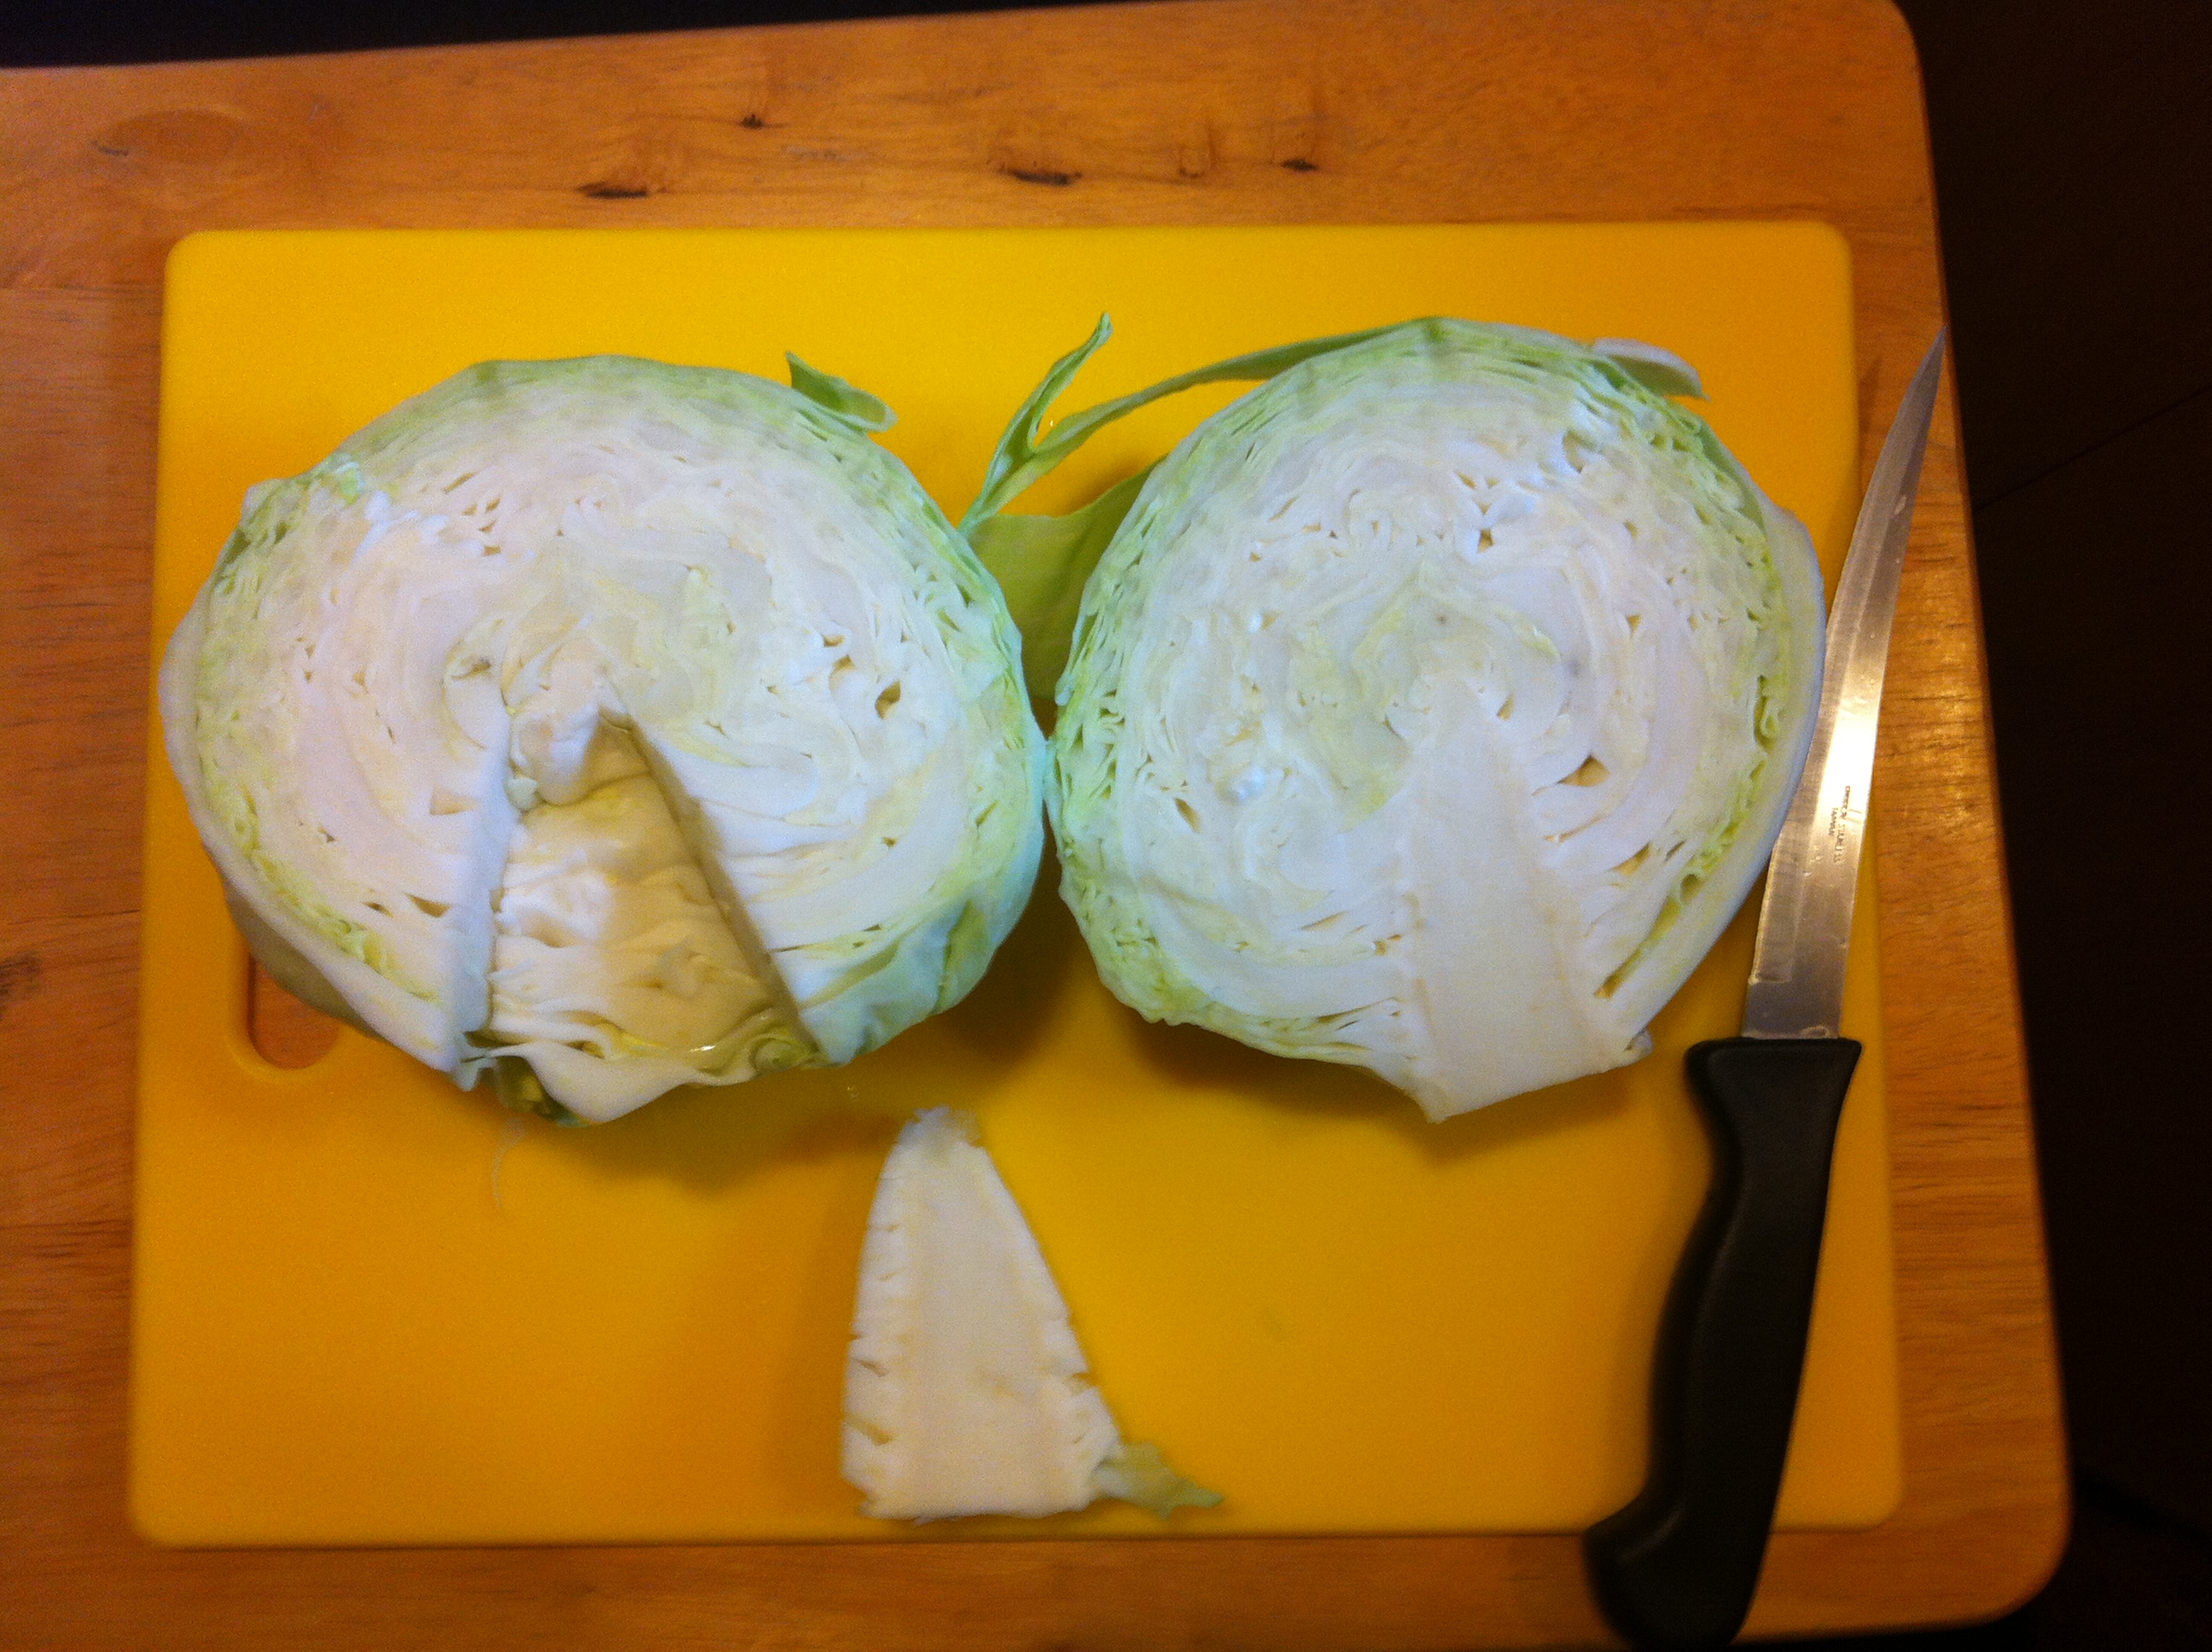
Slice the cabbage in half; it’s best to use a sturdy knife with a long, sharp blade since cabbage is very dense. Remove the core from each side by slicing down each side, creating a triangular shape (photo 2), and then slice underneath until the entire core is removed. You do NOT want to end up eating this part.
Slice each piece in half again and begin slicing on the long, flat end to create long strands that are about 1/4″ wide. When all of the cabbage is sliced, begin prepping your pan. A Dutch oven works well; if not, you’ll probably want to use the largest, tallest pan that you have. This will make it easier to fit all of the cabbage and then stir it as it cooks down without getting it everywhere.
Heat your pan over medium heat, adding 1-2 Tablespoons of butter (or oil). When it’s heated, add the onion and saute until translucent, stirring occasionally.
Add a layer of cabbage, about 1-2″ deep, and sprinkle with the garlic salt blend and pepper. Stir to coat evenly with the butter. Continue adding layers of cabbage and spices until all of the cabbage is in the pan. I usually add dots of butter with every other layer to ensure that there’s enough to coat all of the cabbage; while this adds fat to the dish, it’s what also makes it my idea of “comfort food.” Again, you may add more or less butter, depending upon your preferences; however, make sure that all of the cabbage is at least lightly coated to ensure that it cooks down properly.
Turn the heat down slightly, to medium-low, and put the pan’s lid on, tilting slightly to let the steam escape. If the pan gets too hot and the cabbage starts to brown, turn the heat to low. This is the time-consuming part: check and stir, about every 5-10 minutes, until the cabbage has cooked down and is beginning to look translucent. This can take about a half of an hour or more, depending upon how much haluski you’re making. However, it’s worth it. Do NOT be tempted to turn the heat up to speed the process–the cabbage can end up burned, tough, and not delicious.
When the cabbage is done, turn the heat off and stir in your preferred amount of noodles and potato chunks. I prefer to have more cabbage than noodles and potatoes, and I always just eyeball it. If there are extra noodles and/or potato chunks, I just use them in a different recipe the next day or so. Again, this part is up to you. Add the amounts that you prefer.
Turn the heat back on, low to medium-low, and stir until everything is heated through. Serve. The number of servings that you’ll get depends upon the size of cabbage used, your portion size, and whether or not you have seconds. Or thirds. This recipe will make about 4-8 servings, depending upon whether you use it as a meal or a side dish. It does well when paired with fish or perogies, but I’ll leave it up to you to use your imaginations to see what else it pairs well with; if you come up with something unique and want to share, please do. I’d love to hear about it!
A close-up of the finished haluski, plated and ready to be enjoyed.Fun fact: I served this meal on my Grandmother Anne’s dishes, which I was lucky enough to inherit. I’d like to think that this would make her proud.
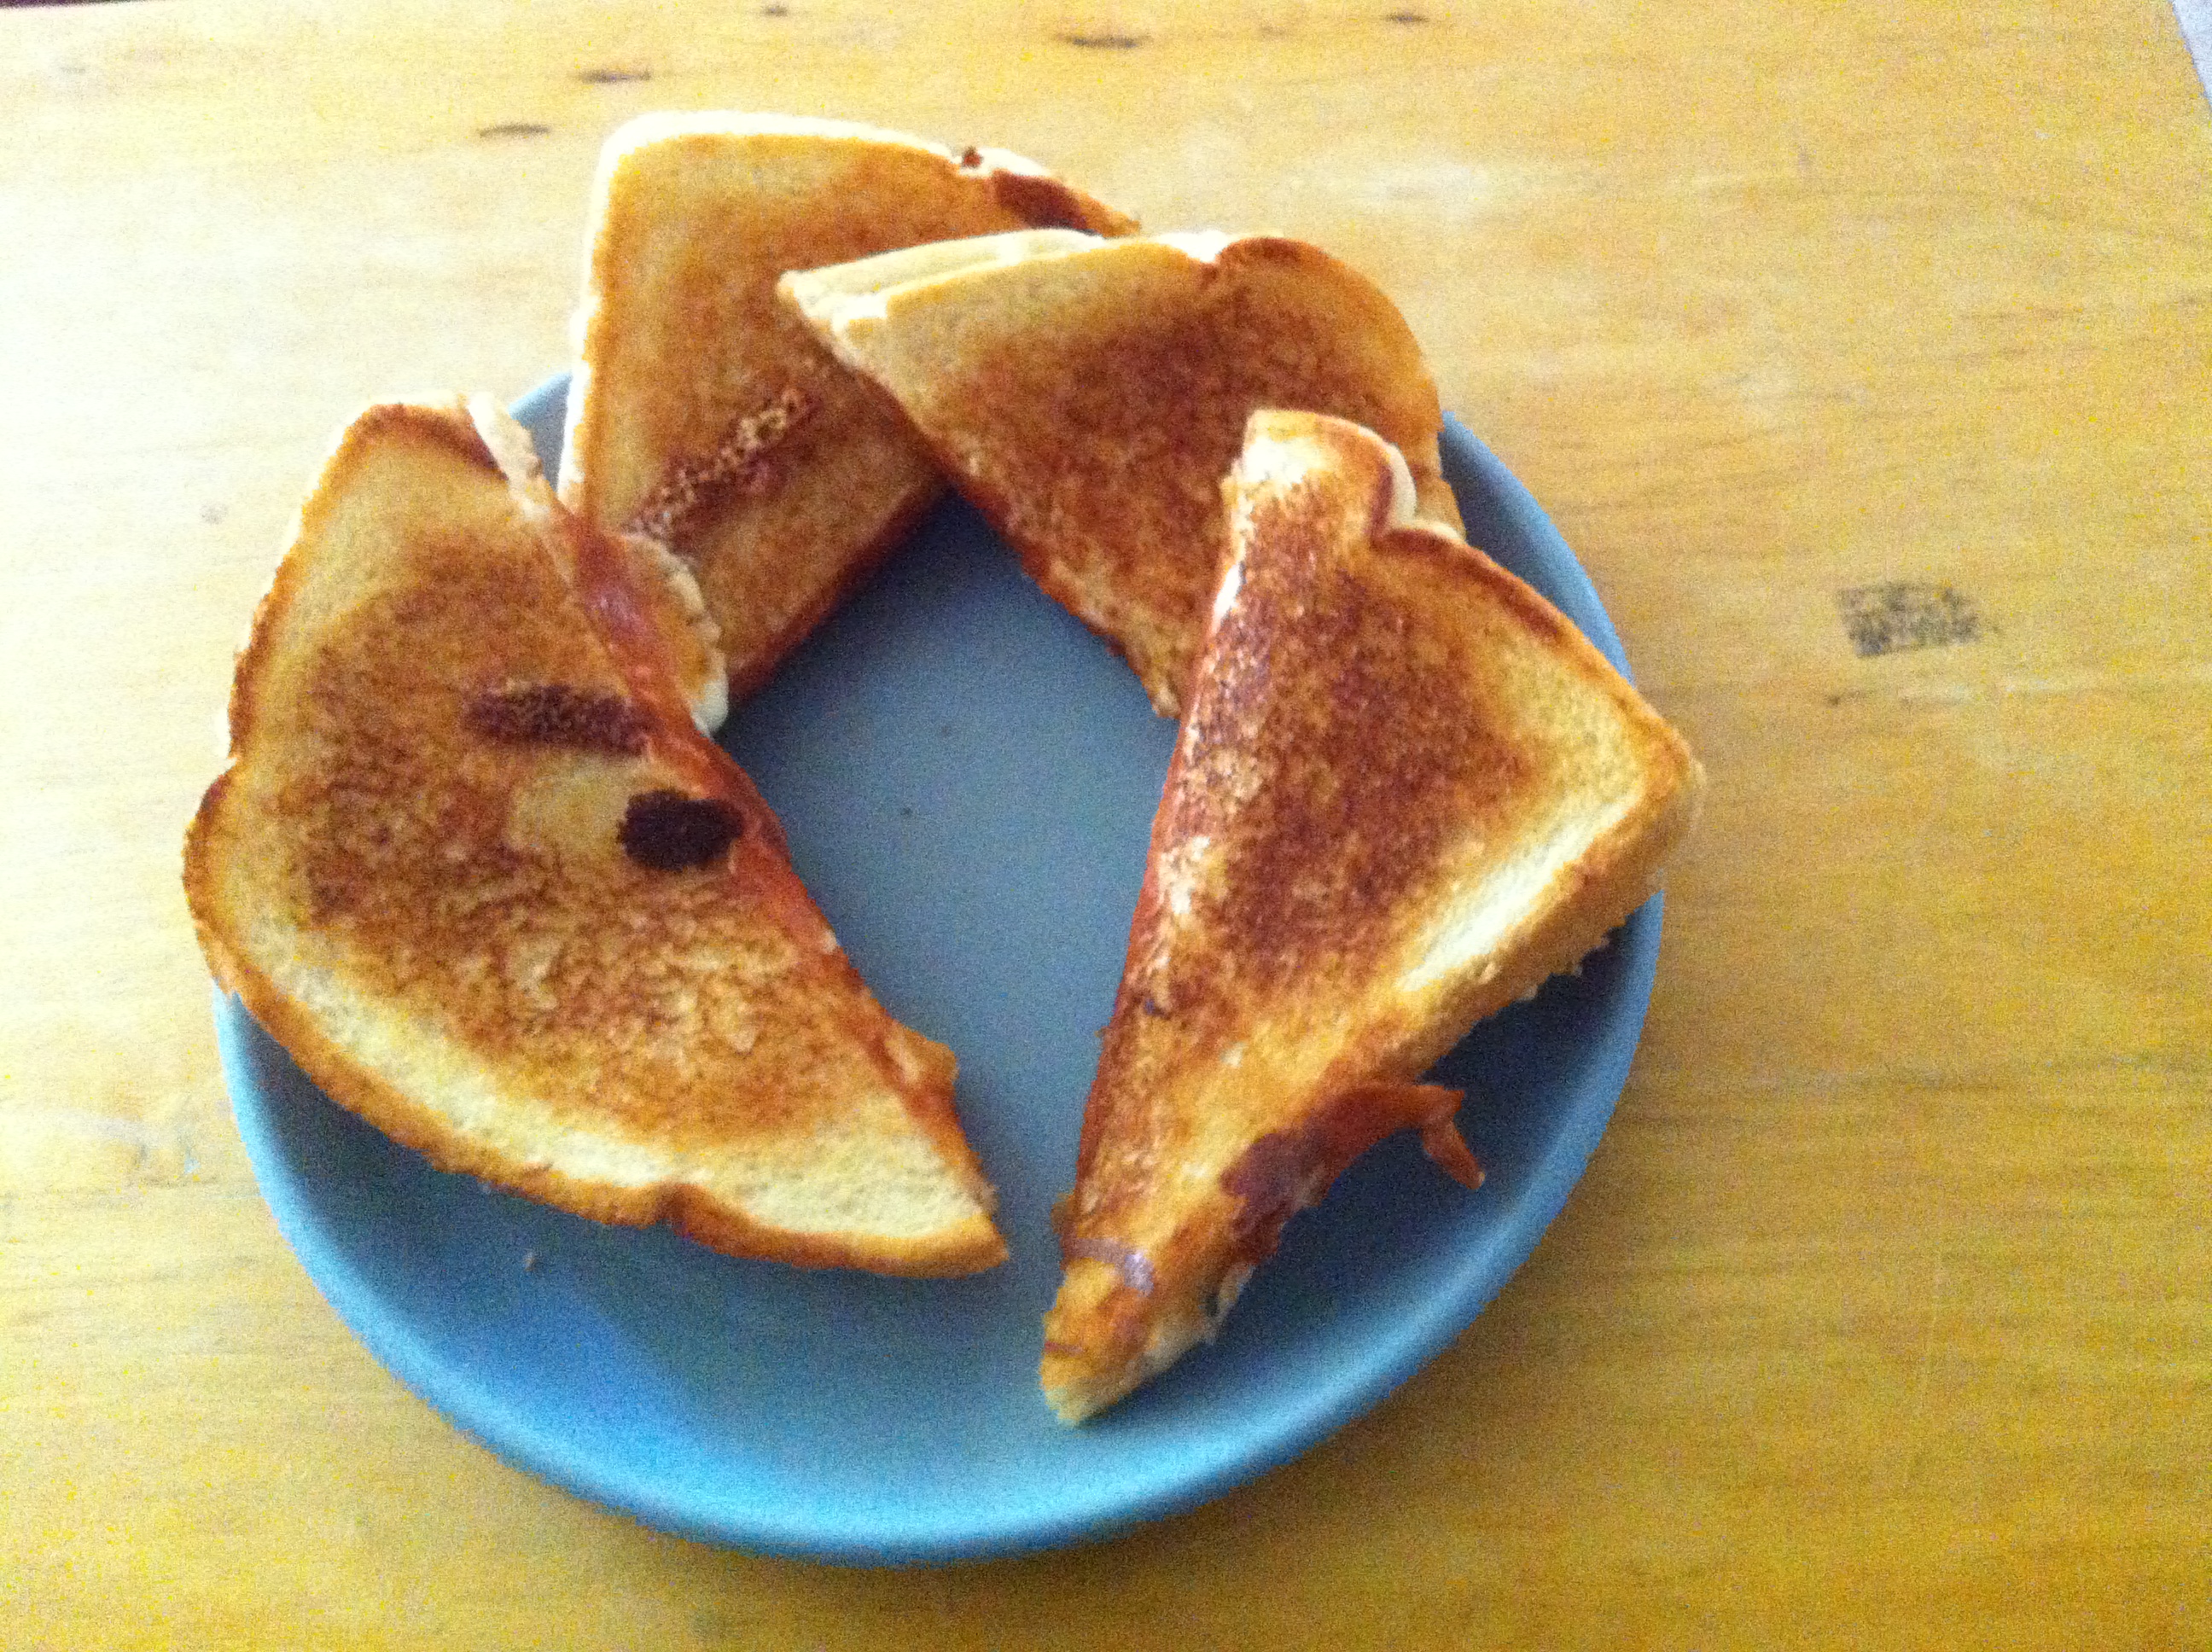
“Comfort food” can be defined as any food that provides both physiological and psychological comfort to the eater. Simply put, it tastes good, it fills you up, and eating it makes you happy. One of my favorite comfort foods is a grilled cheese sandwich. It is easy to make, it requires only a few ingredients, and biting through the crisp, toasted exterior into the supremely-gooey cheese center provides a comforting satisfaction that few other foods can match.
The other day, I decided to indulge myself and my hunger with some grilled cheese sandwiches, knowing that this would not only provide a satiating meal but that it would make a good day even better.
A grilled cheese sandwich is simplicity itself; it can be made with 3 basic ingredients and requires only a minimum of culinary skills. However, it can also rival a fancy meal not only in terms of satisfaction but in the multitude of possible incarnations, depending upon your choice of bread, cheese, and “fat component” (butter, margarine, oil, etc.). With the different types of breads, cheeses, and fats on the market today, a simple grilled cheese can become a thing of beauty and culinary delight, especially with the addition of different vegetables, meats, or even a unique component, such as veggie chips. The seemingly infinite number of possible combinations suggests that you could eat a grilled cheese sandwich every day for a year and never have the same sandwich twice. (If anyone tries this, please let me know how things turn out. It sounds like an interesting experiment, but one that I’m not sure that I could complete. It might make for a unique reality show, though.) In any event, without further ado, here it is:
My Favorite Grilled Cheese Sandwich
4 slices of Italian bread, sliced about 1″ thick
1-2 cups of shredded mozzarella cheese
softened butter (I prefer salted)
a griddle, grill pan, cast iron pan, panini press, waffle iron, etc.
Heat your griddle pan over medium to medium-high heat for about 2-3 minutes. If you’re using a panini press or waffle iron, heat it according to the directions.
Lightly butter one side of each slice of bread; doing this ahead of time is just easier. I use a light coating that is spread evenly over the entire slice, right to the edges. This provides a nice, even crispy exterior.
Place 2 slices, butter-side down, on the hot pan. Evenly distribute about 3/4 of a cup or more of cheese on each slice. If you’re planning on adding vegetables, either during the cooking process or afterward, you might add a bit more or less cheese, depending upon your preferences. I add extra cheese when I add cucumber slices, tomato slices, and lettuce so that there is a good cheese-to-vegetable ratio and to prevent any other ingredient from overshadowing the cheese, as it’s the star of this recipe. Top with remaining slices.
Wait patiently for the butter to melt and create a side of evenly-toasted, crispy goodness. Check the sandwich after 1-2 minutes, turning down the heat if it’s getting too overdone for your taste. When it’s done to your preferences, flip the sandwiches and repeat the process for this side, demonstrating an enviable amount of patience and virtue since you know that the sandwiches are going to taste phenomenal.
When both sides are done, slice each sandwich horizontally and press each piece lightly with a spatula so that some of the cheese oozes out. Balance each piece on its cheesy edge to add an element of toasted, crispy cheese to the sandwich.
Place the finished sandwich on a plate and wait until the cheese cools enough to consume without burning the entire inside of your mouth and your tongue, thus passing the ultimate test of patience and virtue.
NOTE: If you would like to try a panini press to create these sandwiches but do not own one, a George Foreman grill or a waffle iron make pretty good substitutes. Enjoy your sandwiches, and happy eating! 🙂
I first became interested in quinoa a couple of months after switching to mostly meatless meals. Since I didn’t have a lot of recipes for meatless meals and I wasn’t knowledgeable about creating these meals, one of the first recipes that I developed and relied upon was a simple rice and vegetable dish where I’d mix about 4 cups of cooked rice with different vegetables. I tried to use different vegetables so that I wasn’t eating the same thing over and over. I tried sautéing different combinations of fresh vegetables, including peppers, spinach, zucchini, and carrots, and I also made use of the different bags of frozen vegetable combinations that are available, from stir-fry mixes or blends of broccoli, cauliflower, and carrots. I’d steam the frozen veggies and then add them to the cooked rice.
While these combinations are good, they did get repetitious after a few weeks; even adding different spices or sauces, such as soy sauce or spicy orange sauce, got a bit boring. I’d heard of quinoa, but I’d never tried it; after doing some basic internet research and finding out that many sites lauded its health benefits and applauded its versatility and tastiness, I decided to try it. Quinoa is a grain that is chock-full of good stuff; if you’re interested in learning more, two sites that I’d recommend are Simply Quinoa’s “Quinoa Nutrition Facts” (http://www.simplyquinoa.com/quinoa-nutrition-facts/) and Eating Well’s “5 Facts About Quinoa Nutrition and Cooking Quinoa” (http://www.eatingwell.com/healthy_cooking/healthy_cooking_101_basics_techniques/5_facts_about_quinoa_nutrition_and_cooking_quinoa). Both sites offer some useful information, especially for those who are basically unfamiliar with it, as I was. Now that I know more about it, I actually prefer it over rice due to its taste, texture, and nutritional benefits.
While there are several varieties, including white, red, and black, I decided to first try the white since it seemed the most basic. I’ve also tried the red, and I find both to be tasty. I really don’t see much difference between the two varieties, although the red is reportedly preferable for cold salads, according to The Whole Grain Council ( http://wholegrainscouncil.org/node/5881/print), since it holds its shape a little better than the white after cooking. I haven’t ventured into the area of cold salads yet, but, when I do, I’m guessing I’ll take their advice and use the red. 🙂
My first uses of quinoa were simply to substitute the cooked quinoa for rice, as with my rice and veggie dishes. I’ve found that quinoa is a bit heartier and more satisfying than rice, and it also has a more unique “mouth feel” since it is more dense. While I enjoyed having quinoa and vegetables, I found myself wanting something more, so I attempted to use a mixture of cooked quinoa, spinach, and cheese to create vegetable patties that I could cook up in a skillet. These didn’t hold together very well and probably would have been more successful if I’d added an egg to bind the mixture together better, but I found that simply combining certain ingredients in a skillet produced a tasty, satisfying dish not unlike a stove-top casserole. The recipe that I came up with only requires a few ingredients and minimal cooking skills and makes a tasty, satisfying dish that is also filling. An added bonus is that the leftovers reheat well in the microwave, whether you need a hearty lunch for the next day or want to use it as a side dish with a different meal. As always, you might try substituting other vegetables or cheeses to make the dish your own or to include ingredients that you prefer. I hope that you enjoy it as much as I have. Happy eating!
Toasted Quinoa Skillet with Spinach and Feta
2 cups of cooked quinoa (white or red work well)
1 16-ounce package of frozen spinach, thawed and drained (squeeze out most of the excess moisture; it will dry a bit more in the skillet)
1-2 cups crumbled feta cheese
garlic salt and pepper, to taste
1-2 Tablespoons of Canola oil
Cook the quinoa according to package directions. Quinoa cooks similarly to rice, in a 2-1 ratio with water, so to make 2 cups of cooked, you’d use 1 cup of uncooked quinoa and 2 cups of water. I’ve found that adding about 1/2 teaspoon of garlic salt and about 1/4 teaspoon of black pepper to the water as it cooks makes the quinoa tastier, but you can always adjust the spices to your preferences and tastes. The quinoa can be cooked ahead of time, even the day before, to make assembling the skillet even faster.
Heat about 1-2 Tablespoons of Canola oil in a big skillet over medium heat. Using a larger skillet enables you to spread the quinoa around and toast it more evenly and quickly; I prefer to use a 12″ skillet for maximum toasting.
After the oil is hot, add the quinoa and spread evenly. Toast it for anywhere from 3-5 minutes, depending upon how toasty you like it. Just make sure to watch the heat and to stir it around a few times to prevent burning and to toast it evenly.
Add the spinach and some additional garlic salt and pepper, if desired. Other spices, such as turmeric, also work well, so use whatever you prefer. Stir the mixture for 1-3 minutes, until the spinach is hot.
Add the feta and stir until it is melted. If you like a lot of feta, sprinkle more on top after plating the dish. I usually add more since I love feta.
This recipe makes about 2-4 servings, depending on portion size. I usually get 2 meals and a small lunch from it, and I sometimes add black olives after plating since they always go well with spinach and feta.
A delicious, hearty serving of the Toasted Quinoa Skillet with Spinach and Feta
I grew up in a meat-and-potatoes family, which was pretty typical for children in the 1970’s. Most of the meals that I remember involve both ingredients: bacon or sausage with hash browns for Saturday breakfasts; roast with potatoes and carrots on Sundays; ham with scalloped potatoes on Easter; turkey with mashed potatoes on Thanksgiving. Certain meats were required for specific holidays back then, and things like “tofurkey” didn’t exist in our vocabularies, although the now-popular “turducken” probably would’ve been a great success. The idea of meatless meals wasn’t ever entertained, to my knowledge, and, even if it had been, trying to get a kid from my generation to give up things like hot dogs and hamburgers would not have gone over well at all. In fact, although I had begun eating more and more meatless meals over the last decade or so, I did not consciously entertain the idea of going mostly meatless until about six months ago. Since then, I’ve only eaten mean a handful of times, and I haven’t really enjoyed it much, either (with the exception of the turkey that I recently cooked to give to a friend’s parents; it had been in the freezer since Thanksgiving, when I didn’t make it. I did “taste-test” some of the meat and a good portion of the crispy, delicious skin, but, in my defense, I did say that I’d gone “mostly meatless,” not completely. Besides, I had to ensure the quality of the turkey before gifting it, didn’t I?). In any event, I no longer even crave meat or feel like there’s “nothing on the menu” if I go out to eat. I actually prefer focusing on mostly meatless meals, and I’ve found some good recipes and ideas along the way as well as developing some of my own recipes. That’s why I decided to start this blog, to share my experiences, ideas, and suggestions for how anyone can incorporate meatless meals into their diets, meals that are delicious, satisfying, and enjoyable. The ingredients can all be found in almost any grocery store, and most of the recipes do not require more than a basic knowledge of cooking. Hopefully, this will be an entertaining, enjoyable, and even slightly educational blog, and I hope that anyone who finds it also worthy of reading. With that, I’m going to share my first recipe, which I came up with a few nights ago, called “Cheesy Vegetable Casserole Featuring Tater Tots.” Here goes:
Cheesy Vegetable Casserole Featuring Tater Tots
Ingredients:
2 cups tater tots (they can still be frozen–no need to thaw)
1 14-ounce bag of yellow and zucchini squash (I used frozen)
1 cup of Lima beans (again, I used frozen)
1 cup of corn (yep–frozen)
1 shredded carrot (I actually used a fresh carrot, just to be different)
1 cup of sour cream (regular, low-fat, or non-fat: it’s up to you)
1/2 of a can of cream of chicken condensed soup, undiluted (I used a low-sodium, healthy version; cream of celery or other creamed soups can also be used)
1 cup of shredded cheese + about 1/2 cup to put on top of the casserole (I used about half sharp cheddar and half of a Mexican cheese blend since it was all that I had left–did I mention that this recipe is good in a pinch, when you have a little bit of many different ingredients to use up?)
Assembly:
Mix the sour cream and soup in a small bowl. Mix all of the other ingredients (except the extra cheese) together in a large bowl. Pour the sour cream/soup mix into the large bowl and toss to coat as evenly as possible.
Place it in a 13 X 9″ baking pan. Sprinkle the remaining 1/2 cup of cheese (or more, if you prefer) over the top. Bake at 350 degrees for about 30-40 minutes or until the cheese is all hot and bubbly.
That’s all it takes, and it ends up being a nice, satisfying meatless meal. You can also substitute whatever vegetables you prefer, and they can be fresh or frozen. You could also substitute other potatoes for the tater tots, from frozen french fries, hash browns, or yam fries to chunks or slices of fresh potatoes or yams. The great thing about many meatless recipes is that you can switch out the ingredients in different ways and create different types of casseroles. Heck, you could even add some type of meat, such as cooked chicken, if you really wanted to.
I hope that you’ve enjoyed this post and the recipe. Below is a photo of what my finished casserole looked like (taken by an amateur photographer still learning how to use her iPhone). Till next time, happy cooking! 🙂
This is your very first post. Click the Edit link to modify or delete it, or start a new post. If you like, use this post to tell readers why you started this blog and what you plan to do with it.
![IMG_0805[1]](https://myadventureswithmostlymeatlessmeals.files.wordpress.com/2016/02/img_08051.jpg?w=700)